How to Create an Order Limit
Table of Contents
How to Create an Order Limit
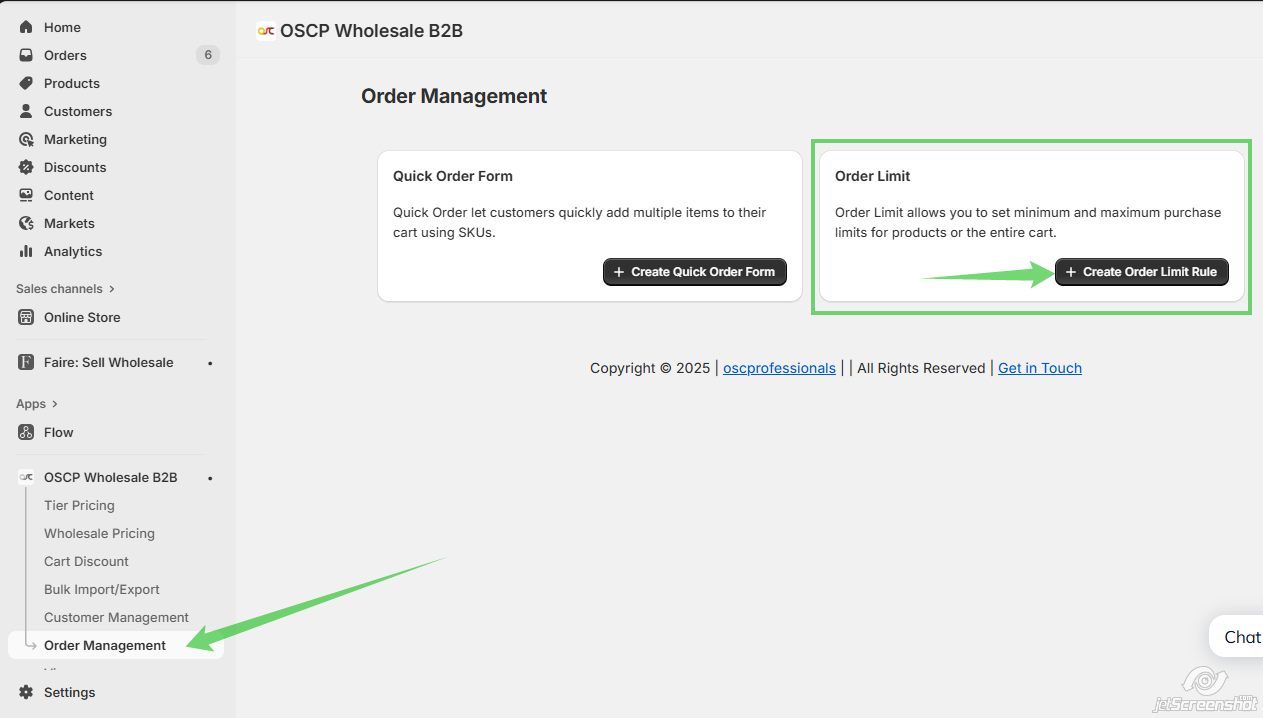
Step 1: Navigate to Order Management
- Go to the OSCP Wholesale B2B app in your admin panel.
- Select Order Management from the sidebar.
Step 2: Access Order Limit Section
In the Order Management page, click Create Order Limit Rule under the Order Limit section.
Step3: Set General Settings
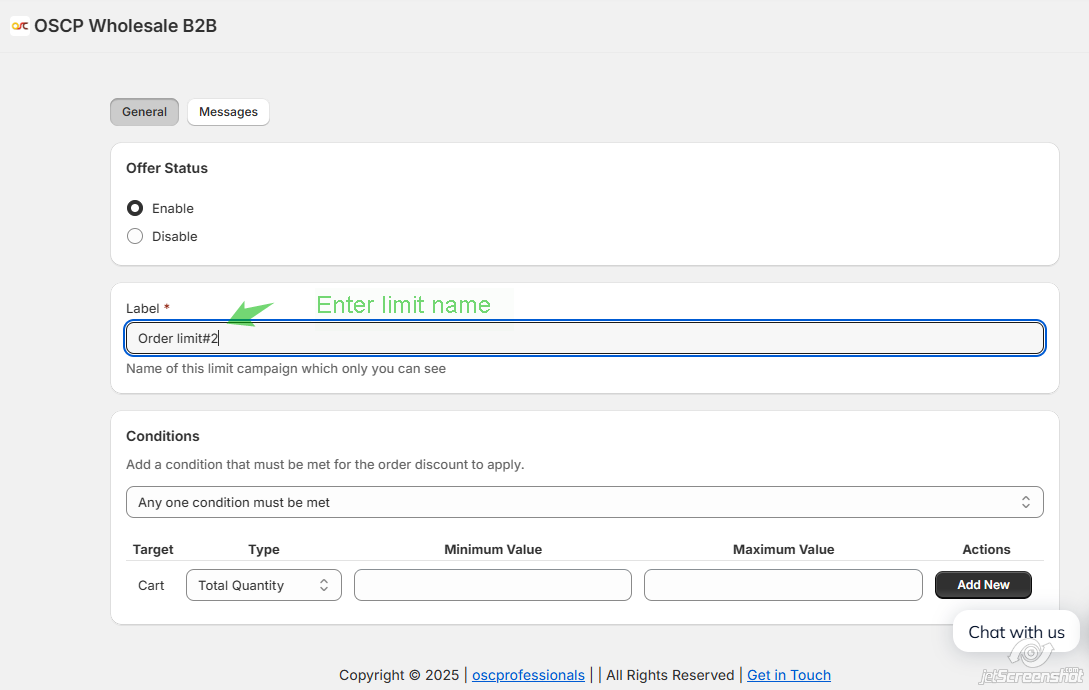
- Enable the limit by selecting Enable under Offer Status.
- Enter a Limit Name for your reference (this is internal and won’t be visible to customers).
Step 4: Define Conditions
- Choose whether All conditions must be met or Any one condition must be met.
- Set the Target as Cart.
- Select Type (e.g., Total Quantity or Total Value).
- Enter Minimum Value and Maximum Value (e.g., quantity between 1 and 5).

Step 5: Save the Limit
- Click Add New to save the condition(s).
- Review and save the entire order limit rule
Step 6: You can view and manage the listing of Order Limit.

Customizing Messages
You can customize the messages as you wish and use the variables noted in the ‘Message’ tab.
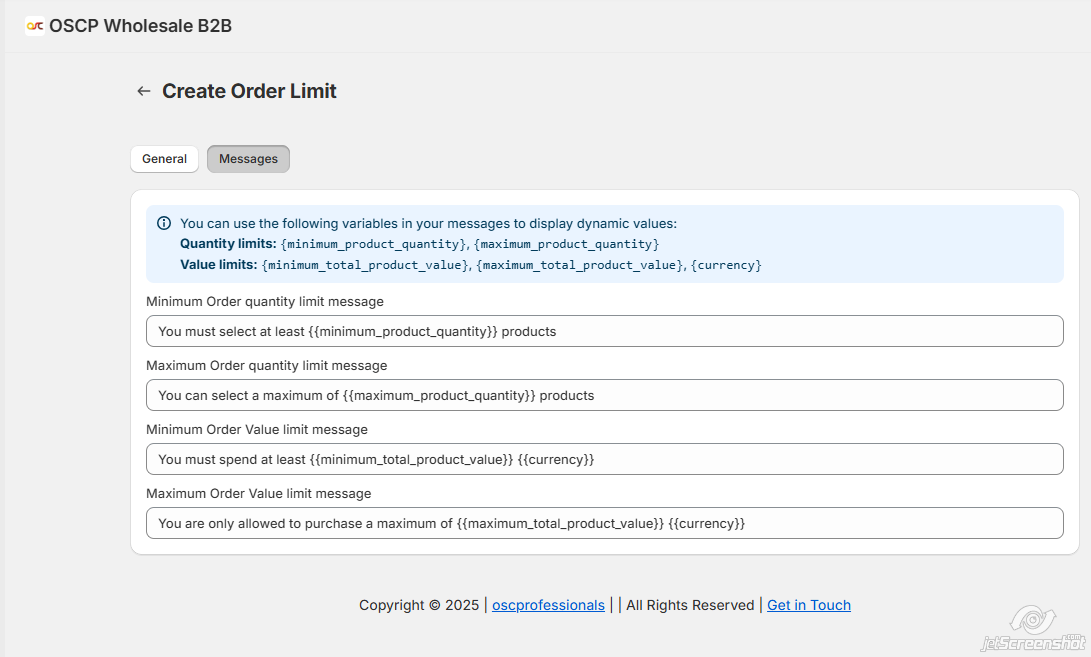
- Review and save the entire order limit rule.
Frontend Display
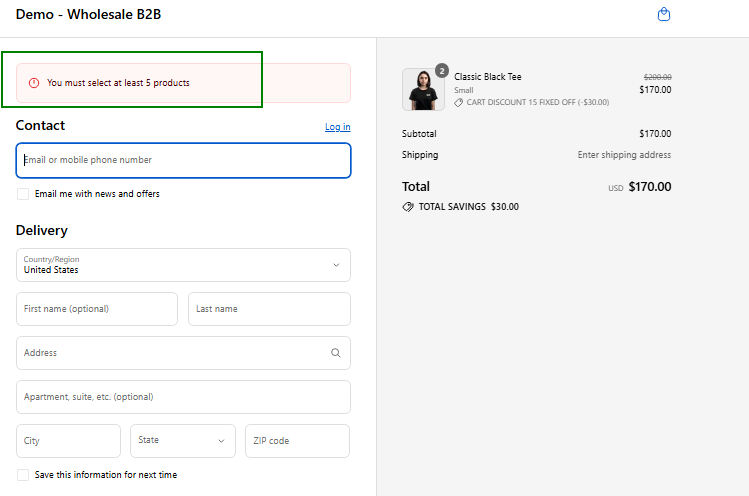
How to Add a Checkout Rule for Order Limit Feature
1. Go to Checkout Settings
From your Shopify Admin, navigate to Settings > Checkout.
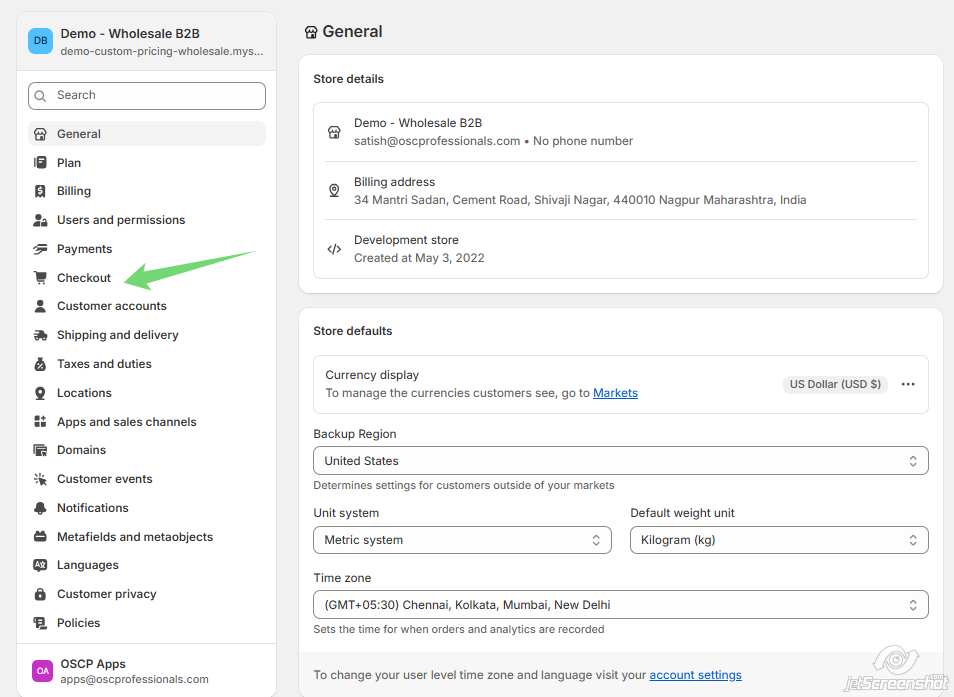
2. Find Checkout Rules Section
- Scroll to the Advanced preferences area.
- Locate Checkout rules and click Add rule.
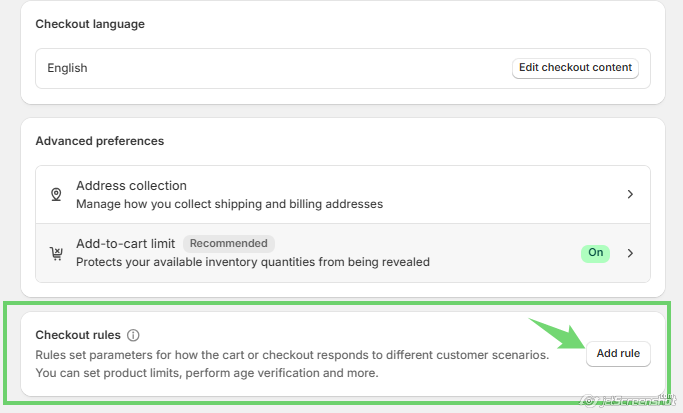
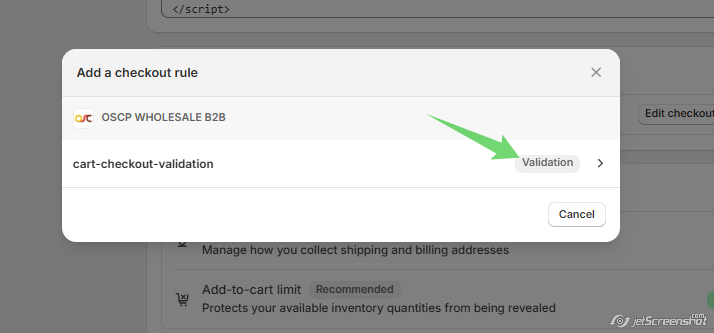
3. Select the Validation Rule
In the popup, select the cart-checkout-validation option and click to proceed.
4. Enable the Rule
- The checkout rule page will open.
- Make sure the rule is Turned On (green toggle).
- Optionally, check the box for:
-
-
- Allow all customers to complete checkout — this lets orders process even if validation fails.
-
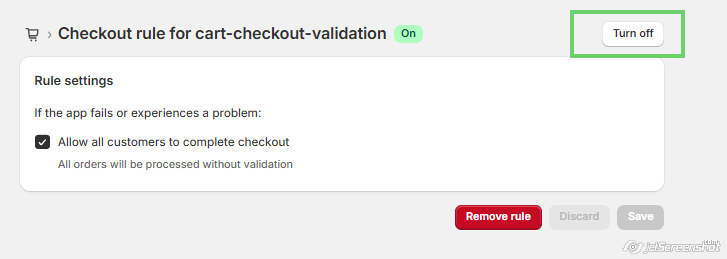
5. Save Your Settings
Click Save to activate the checkout validation rule.
